How to Make a Preview Photo Into Black and White Line Art
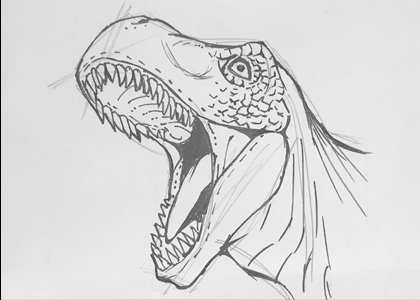
So, you merely scanned or took a motion-picture show of your paw-drawn line fine art with your smartphone and, you go to color it to find that it just doesn't look equally ready to color as the original. At times like these, it's best to excerpt your line work and catechumen it into something more suited for digital coloring. You can practise this by using the Convert Brightness to Opacity office in Clip Studio Paint and SAI or the Alpha Channel function in Photoshop.
Adjusting the Image Colour
Using our graphics software of choice, nosotros'll begin by opening the scanned or photo image of our illustration.
Even though the original prototype is black lines on white paper, the imported image ends up with either a gray tone to it, or the lines aren't as strong as in the original. To fix this issue, we will adjust the image and so that the background is completely white and the lines are solid and clear. The method we will use to accomplish this depends on the graphics software we want to use.
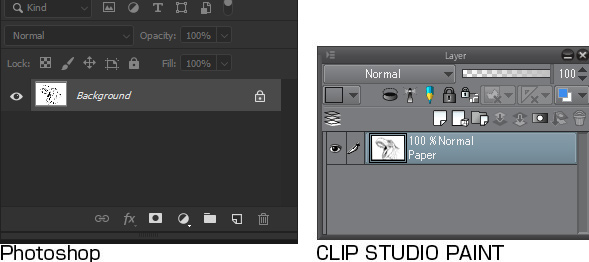
Photoshop & Prune Studio Pigment
First, nosotros'll accommodate the color using an aligning layer (Tonal Correction layer).
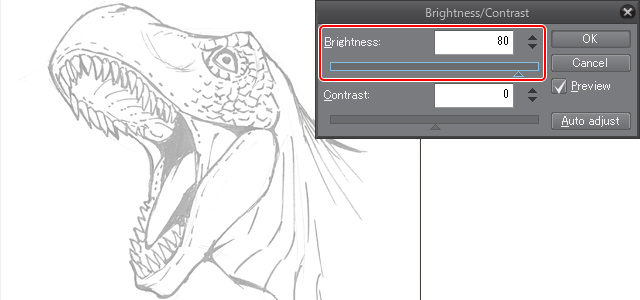
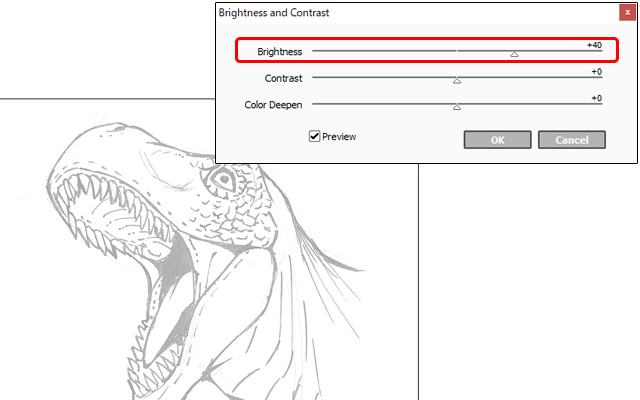
● Brightness/Dissimilarity
Use Brightness/Contrast to brighten the overall prototype.
In Photoshop:
Layer bill of fare > New Aligning Layer > Effulgence/Contrast
In Prune Studio Paint:
Layer carte du jour > New Correction Layer > Brightness/Dissimilarity
From the displayed carte du jour, use the Effulgence slider to make the paper groundwork as white equally possible without losing also much line art detail.
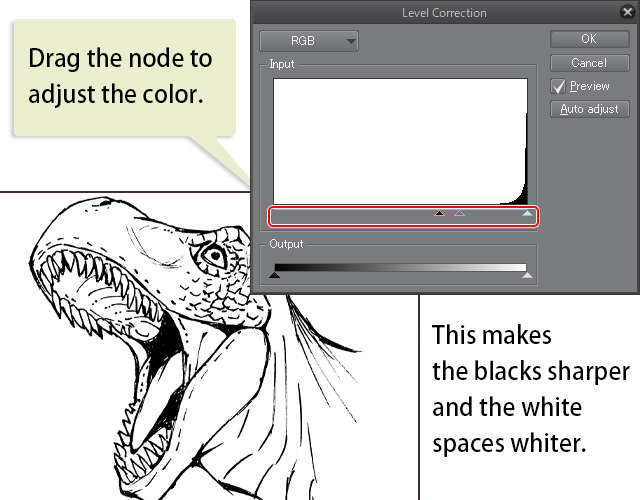
● Level Correction
Next, use Level Correction to brand the lines more singled-out.
In Photoshop:
Layer menu > New Adjustment Layer > Levels
In Prune Studio Paint:
Layer bill of fare > New Correction Layer > Level Correction
From the displayed bill of fare, operate the triangle nodes at the lesser of the graph by dragging them correct or left every bit needed. This allows yous to whiten the colour and shadows of the paper, equally well every bit thicken and darken the line work.
In one case complete, the adjustments will exist created in the form of an adjustment layer (Tonal Correction layer). If you aren't quite satisfied with the results, double click the adjustment layer icon to display the menu again and readjust your settings.

Lastly, select the Layer menu > Flatten image and the line art layer will merge with the adjustment layer (Tonal Correction layer).
Just in example, I recommend saving your file once before merging.
Adjusting the Image Color: Paint Tool SAI
For SAI, select and set the Filter card > Brightness/Dissimilarity settings.
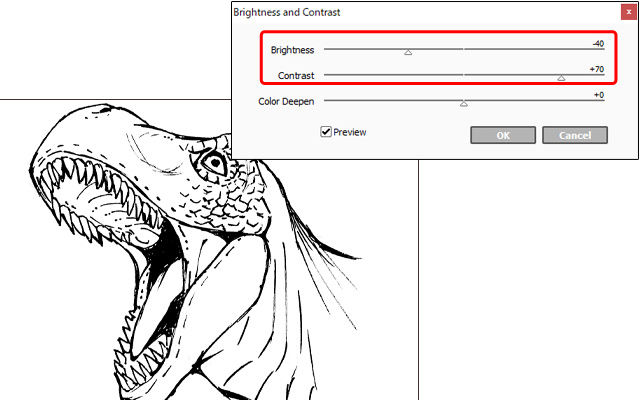
In the Brightness and Contrast dialog, conform the Effulgence slider so that the newspaper appears white. Make sure that thin lines practise not disappear or become too sparse while adjusting. In one case satisfied, click OK.
Select the [Filter] carte > [Effulgence/Contrast] once again.
This fourth dimension, adjust the [Contrast] and [Brightness] sliders to darken the lines. Take care that lines don't go as well thick or extend by your original line piece of work.
Completing the colour adjustments
Compared to the original image, nosotros have created much nicer looking line fine art, night lines on a white background.
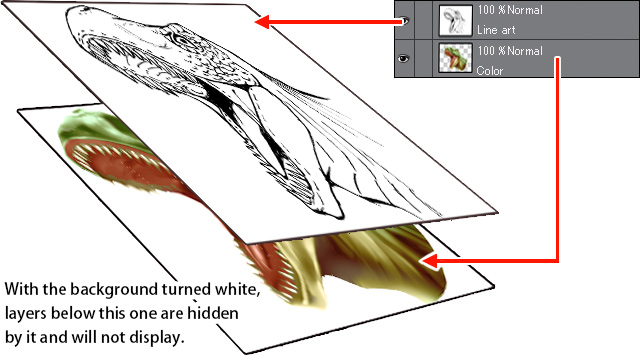
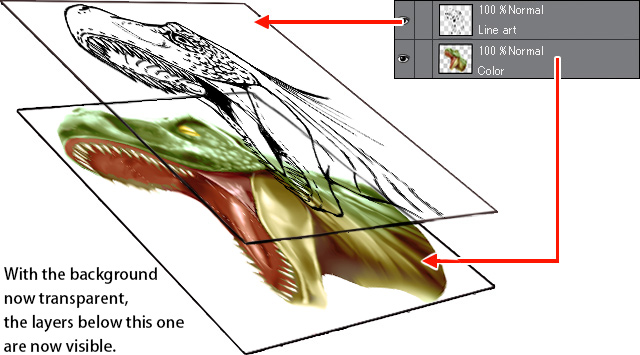
In order to make the coloring step become more easily, nosotros will "excerpt" the line work by transforming the white background into a transparent background.
Extracting Line Art: Clip Studio Paint & SAI
We volition turn the white transparent by using "convert brightness to opacity." Select the following commands to practise this.
Clip Studio Pigment:
Edit menu > Convert brightness to opacity
SAI:
Layer menu > Luminance to Transparency
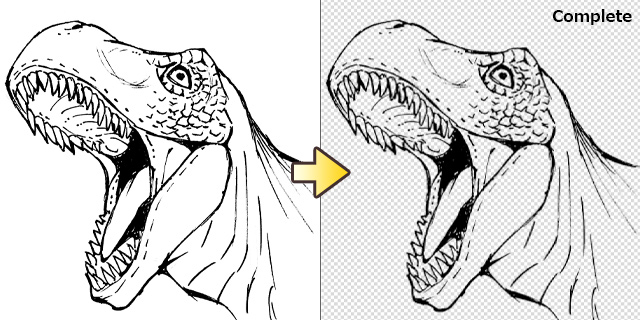
With this, the line art has been extracted!
Annotation:
After using Prune Studio Pigment's Convert brightness to opacity, a transparent checkered pattern will announced.
Select the Layer menu > New Layer > Newspaper to create a new paper layer over the transparent pattern.
Extracting Line Art: Photoshop
Using Alpha Channel, we will turn the white transparent.
The Alpha Channel function can excerpt transparency, uses selections as a mask for editing, and has a saving ability.
Note: The Alpha Aqueduct feature cannot exist used in Photoshop Elements.
● Cut the line art
Permit'due south cut the line art from the sheet.
(1) Select the Selection bill of fare > All
(2) Select the Edit carte > Cut
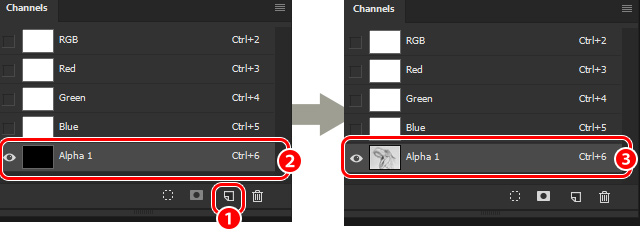
● Creating an Alpha Channel
Select the Window carte du jour > Channels to display and create an Alpha Channel.
(i) Click Create New Aqueduct from the Channels panel
(2) Select the created Alpha Aqueduct
(3) Select the Edit bill of fare > Paste to paste the line art to the Alpha Channel.
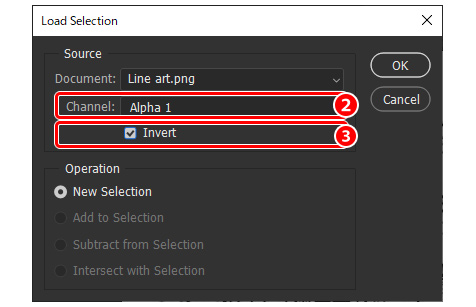
● Creating a selection
Let's now create a pick based on the opacity and line thickness.
(1) Select the Selection menu > Load Selection
(two) Select the Alpha Channel nosotros used before from Channels
(three) Cheque Invert and click OK
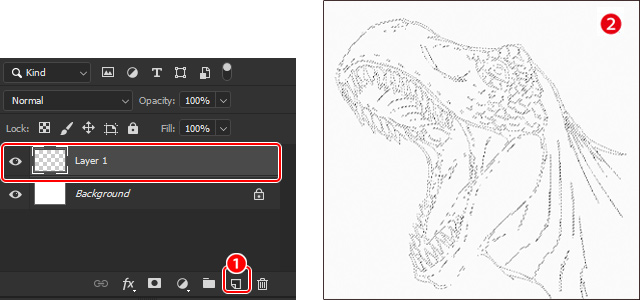
● Creating line art
Next, we'll brand a new layer based on the line art.
(one) Create a new layer by selecting Create a New Layer from the Layer panel
(2) A canvas with the dimensions of the selected expanse volition appear
(3) Select the Edit carte > Fill
(iv) Select a color to make full from Contents
(v) Uncheck the Preserve Transparency option and click OK
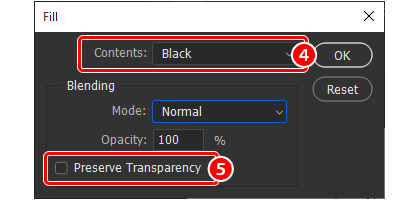
With this, the line fine art has been extracted!
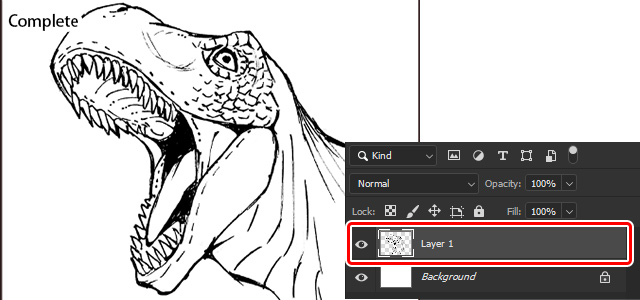
The Line Art is Now Ready!
With this finished line art, you can add colored layers underneath the line fine art without erasing the lines.
Source: https://www.clipstudio.net/how-to-draw/archives/154453
0 Response to "How to Make a Preview Photo Into Black and White Line Art"
Postar um comentário